forked from metin-server/m2dev-server
801 lines
24 KiB
Markdown
801 lines
24 KiB
Markdown
# M2Dev Server
|
|
|
|
This repository contains the core server files and configurations. It includes fixes for database performance, quest logic, and crucial setup scripts.
|
|
|
|
**For installation and configuration, see [instructions](#installationconfiguration) below.**
|
|
|
|
---
|
|
|
|
## 📋 Changelog
|
|
|
|
### 🐛 Bug Fixes
|
|
* **Frostbeard synching fixed:** The monster now runs and attacks without issues
|
|
* **Item drops updated:** Item drops for Razador and Nemere bosses have been added/updated fully official-like
|
|
* **Missing Szel group added:** Missing Szel group for Nemere's Watchtower has been added
|
|
* **Experience points from chests:** Fixed a bug where experience points were being replaced by Experience Rings when opening chests
|
|
* **Gold from chests:** Fixed a bug where Gold was being replaced by a Gold inventory item that had no value when opening chests
|
|
|
|
### ⬆️ Feature Improvements
|
|
* **Nemere's Watchtower dungeon added:** The Nemere's Watchtower dungeon has been added almost fully translated for all locales, **fully official-like**:
|
|
* **Please run channels.py and then install.py to install the new map**
|
|
* Map index 352 (in core 2)
|
|
* Nemere is being included as a valid target for the Collect Quest Lv. 90
|
|
* Safeguards added to prevent mounting inside the dungeon in horse_summon.quest and ride.quest
|
|
* The full dungeon quest, official-like, with the correct cooldown times, true per-hit conditional immunity (MISS hits) for targeted monsters and a lot more helping functions:
|
|
* `d.regen_file_with_immunity`: Spawn all monster/groups from a dungeon folder's regen.txt file with conditional immunity embedded from spawn
|
|
* `d.regen_file_with_vids`: The VIDs of all spawned monsters/groups from a dungeon folder's regen.txt file are being returned to Lua for further manipulation
|
|
* `d.spawn_group_with_immunity`: Spawn a group of monsters via its ID with conditional immunity embedded from spawn
|
|
* `d.spawn_group_with_vids`: The VIDs of all monsters from the group spawned are being returned to Lua for further manipulation
|
|
* `d.spawn_mob_with_immunity`: Spawn a single monster with conditional immunity embedded from spawn
|
|
* `npc.add_damage_immunity_condition`: Add a damage immunity condition to an already spawned monster
|
|
* `npc.clear_damage_immunity_conditions`: Clear all damage immunity from a monster so it can take damage normally again
|
|
* `npc.is_damage_immune`: Check if a mob has damage immunity using its VID
|
|
* `npc.set_damage_immunity`: Set damage immunity to a monster using its VID
|
|
* `npc.set_damage_immunity_with_conditions`: Set conditional damage immunity to a monster using its VID
|
|
* **Immunity vs Conditional immunity**: When a monster is immune to damage all hits are returning as MISS and it cannot be poisoned, burned, slowed or stunned. A condition is a rule that when applied, the monster's immunity is being ignored (for example, a mob is immune to damage unless the attacker is a Ninja - job 1). Multiple conditions are possible.
|
|
* Added the data/dungeon folder with all the regen information for all stages
|
|
* Added all translations strings for all languages (some translations may be incomplete, look for English-translated strings in translate_XX.lua/locale_string_XX.lua)
|
|
* **Dead/Wounded Soldier NPCs added:** Added Dead/Wounded Soldier NPCs in Fireland and Snow Mountain as well as the Wounded Soldier NPC in Nemere's Watchtower (stage 6)
|
|
* **Dungeon Entry Men updated:** Updated the Dungeon Entry Men's rotations and added correctly rotated Barricade NPCs around them, outside Nemere's Watchtower and Purgatory dungeon entrances
|
|
|
|
<br>
|
|
<br>
|
|
|
|
---
|
|
|
|
<br>
|
|
<br>
|
|
|
|
# Installation/Configuration
|
|
If everything is done right in the setup and build of the [Server Source](https://github.com/d1str4ught/m2dev-server-src), this process should be quick and easy! If you haven't yet setup your Server Source, **now is the chance to do so as it is a required step to continue!**
|
|
|
|
Below you will find a comprehensive guide on how to configure all the necessary components from scratch.
|
|
|
|
This guide is made using a **Windows** environment as the main environment and showcases both **Windows** and **FreeBSD** (virtual machine) implementation. If you are not using Windows, please feel free to **adapt these instructions for your operating system**.
|
|
|
|
This guide also uses the latest versions for all software demonstrated as of its creation date at February 4, 2026.
|
|
|
|
© All copyrights reserved to the owners/developers of any third party software demonstrated in this guide other than this project/group of projects.
|
|
|
|
<br>
|
|
|
|
### 📋 Order of projects configuration
|
|
If one or more of the previous items is not yet configured please come back to this section after you complete their configuration steps.
|
|
|
|
> - ✅ [M2Dev Server Source](https://github.com/d1str4ught/m2dev-server-src)
|
|
> - ▶️ [M2Dev Server](https://github.com/d1str4ught/m2dev-server) [**YOU ARE HERE**]
|
|
> - ⏳ [M2Dev Client Source](https://github.com/d1str4ught/m2dev-client-src)
|
|
> - ⏳ [M2Dev Client](https://github.com/d1str4ught/m2dev-client) [**ALSO CONTAINS ADDITIONAL INFORMATION FOR POST-INSTALLATION STEPS**]
|
|
|
|
<br>
|
|
|
|
### 🔀 Available options
|
|
The source and the server project can be ran in either a **FreeBSD** or a **Windows** environment. Other Linux flavors are not fully supported and may not be fully compatible yet.
|
|
|
|
This tutorial will be showing how to install in both FreeBSD and Windows environments.
|
|
|
|
<br>
|
|
|
|
##  **FreeBSD**
|
|
|
|
### ⬇️ Obtaining the Serverfiles
|
|
|
|
First things first, find a folder of your choosing where you will be cloning the Serverfiles project (server). In your terminal, `cd` into that location and download the project using `git`.
|
|
|
|
<details>
|
|
<summary>
|
|
Here's how
|
|
</summary>
|
|
|
|
<br>
|
|
|
|
>
|
|
> <br>
|
|
>
|
|
>
|
|
> This example will use `/usr/home/game` as the working directory.
|
|
>
|
|
> Execute these commands:
|
|
>
|
|
> ```
|
|
> mkdir /usr/home/game
|
|
> cd /usr/home/game
|
|
> git clone https://github.com/d1str4ught/m2dev-server.git .
|
|
> ```
|
|
> Mind the `.` in the end of the last command.
|
|
>
|
|
> With the `.`, the project will be cloned right in `/usr/home/game`, while without it, it will be cloned as `/usr/home/game/m2dev-server`.
|
|
>
|
|
> This is just a preference, either way is fine.
|
|
>
|
|
> <br>
|
|
>
|
|
> ### ✅ You have successfully obtained the Serverfiles project!
|
|
>
|
|
> <br>
|
|
>
|
|
</details>
|
|
|
|
<br>
|
|
|
|
### 🛻 Getting everything in the right place
|
|
|
|
Before getting into the actual configuration of the files, it is very important that you get your **compiled binaries** into the right places.
|
|
|
|
**If you haven't compiled the Server Source yet, you should pause here, compile everything and come back to this point**!
|
|
|
|
<details>
|
|
<summary>
|
|
After your builds are done
|
|
</summary>
|
|
|
|
<br>
|
|
|
|
>
|
|
> <br>
|
|
>
|
|
> What you need to do is distribute the built binaries in their respective locations within the **Server** project and assign full system permissions (`0777`). You will find the built binaries in the `server-src/build` folder:
|
|
> - game
|
|
> - db
|
|
> - qc
|
|
>
|
|
> First, `cd` into that directory and then execute these commands (**replace the directories with your own structure!!!**):
|
|
>
|
|
> ```
|
|
> cd /usr/home/src/build/bin
|
|
>
|
|
> cp ./game /usr/home/game/share/bin/game
|
|
> chmod 777 /usr/home/game/share/bin/game
|
|
>
|
|
> cp ./db /usr/home/game/share/bin/db
|
|
> chmod 777 /usr/home/game/share/bin/db
|
|
>
|
|
> cp ./qc /usr/home/game/share/locale/english/quest/qc
|
|
> chmod 777 /usr/home/game/share/locale/english/quest/qc
|
|
> ```
|
|
> **Note**: For `qc`, replace `english` with your locale if you have changed it.
|
|
>
|
|
> <br>
|
|
>
|
|
> #### You should now have the following files in their respective directories with full system permissions assigned:
|
|
> - `/usr/home/game/share/bin/game`
|
|
> - `/usr/home/game/share/bin/db`
|
|
> - `/usr/home/game/share/locale/english/quest/qc`
|
|
>
|
|
> <br>
|
|
>
|
|
> ### ✅ You have distributed your built binaries to their destination directories!
|
|
>
|
|
> <br>
|
|
>
|
|
</details>
|
|
|
|
<br>
|
|
|
|
### 🛠️ Building the quests
|
|
|
|
This step is gonna be extremely easy and most of you are very familiar with it.
|
|
|
|
<details>
|
|
<summary>
|
|
Here's what to do
|
|
</summary>
|
|
|
|
<br>
|
|
|
|
>
|
|
> <br>
|
|
>
|
|
> First, `cd` into the destination directory of your `qc` built binary:
|
|
> ```
|
|
> cd /usr/home/game/share/locale/english/quest
|
|
> ```
|
|
>
|
|
> Next, run the `make.py` file to execute the `qc` and build all your quests:
|
|
>
|
|
> ```
|
|
> python make.py
|
|
> ```
|
|
>
|
|
> **WARNING**: You need to **first `cd` into the quests folder** before executing the `make.py` script!
|
|
> Commands like:
|
|
> ```
|
|
> python /usr/home/game/share/locale/english/quest/make.py
|
|
> ```
|
|
> **will result in errors!**
|
|
>
|
|
> This happens because when you `cd` in a folder you are changing the `cwd` (current working directory). If your `cwd` is not the `quest` folder, the `make.py` script will not be able to find your quests and hence, an error will appear.
|
|
>
|
|
> <br>
|
|
>
|
|
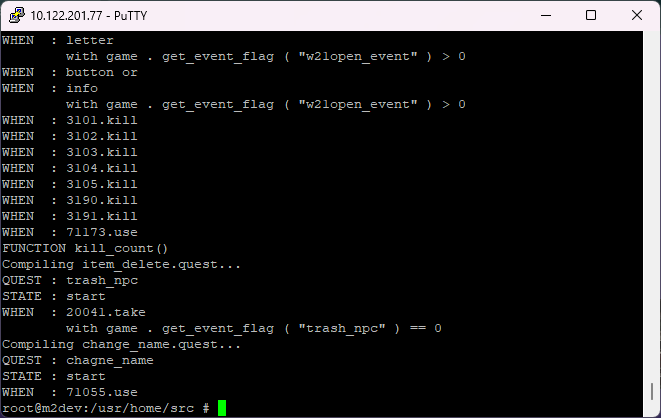
> After `qc` has done its job, your terminal should be looking like this:
|
|
>
|
|
> 
|
|
>
|
|
> <br>
|
|
>
|
|
> ### ✅ You have successfully built the quests!
|
|
>
|
|
> <br>
|
|
>
|
|
</details>
|
|
|
|
<br>
|
|
|
|
### 📊 Importing the databases and tables
|
|
|
|
If you've configured your database correctly in the Server Source part and you can successfully connect to your root account with your terminal or/end your database management software (Navicat), then this process is gonna be very easy.
|
|
|
|
<details>
|
|
<summary>
|
|
The process
|
|
</summary>
|
|
|
|
<br>
|
|
|
|
>
|
|
> <br>
|
|
>
|
|
> There's 5 different databases that you need to import into your MariaDB/MySQL Server:
|
|
> - `account`
|
|
> - `common`
|
|
> - `hotbackup` (empty database, needs to simply exist)
|
|
> - `log`
|
|
> - `player`
|
|
>
|
|
> <br>
|
|
>
|
|
> You have 2 options to import these databases and their tables
|
|
>
|
|
> #### **1. Terminal**
|
|
> First, you need to create the 5 databases before importing their tables and data.
|
|
>
|
|
> In your terminal type these commands:
|
|
>
|
|
> ```
|
|
> CREATE DATABASE account;
|
|
> CREATE DATABASE common;
|
|
> CREATE DATABASE player;
|
|
> CREATE DATABASE log;
|
|
> CREATE DATABASE hotbackup;
|
|
> exit;
|
|
> ```
|
|
>
|
|
> <br>
|
|
>
|
|
> Next, in your `/usr/home/game/sql` (or wherever you installed the serverfiles) you have some `*.sql` files (`account.sql`, `common.sql`, etc...).
|
|
>
|
|
> You can use these files to import everything with a simple command.
|
|
>
|
|
> First `cd` into the `/sql` folder:
|
|
>
|
|
> ```
|
|
> cd /usr/home/game/sql
|
|
> ```
|
|
>
|
|
> and then:
|
|
>
|
|
> ```
|
|
> mysql -u root -p account < account.sql
|
|
> mysql -u root -p common < common.sql
|
|
> mysql -u root -p log < log.sql
|
|
> mysql -u root -p player < player.sql
|
|
> ```
|
|
>
|
|
> <br>
|
|
>
|
|
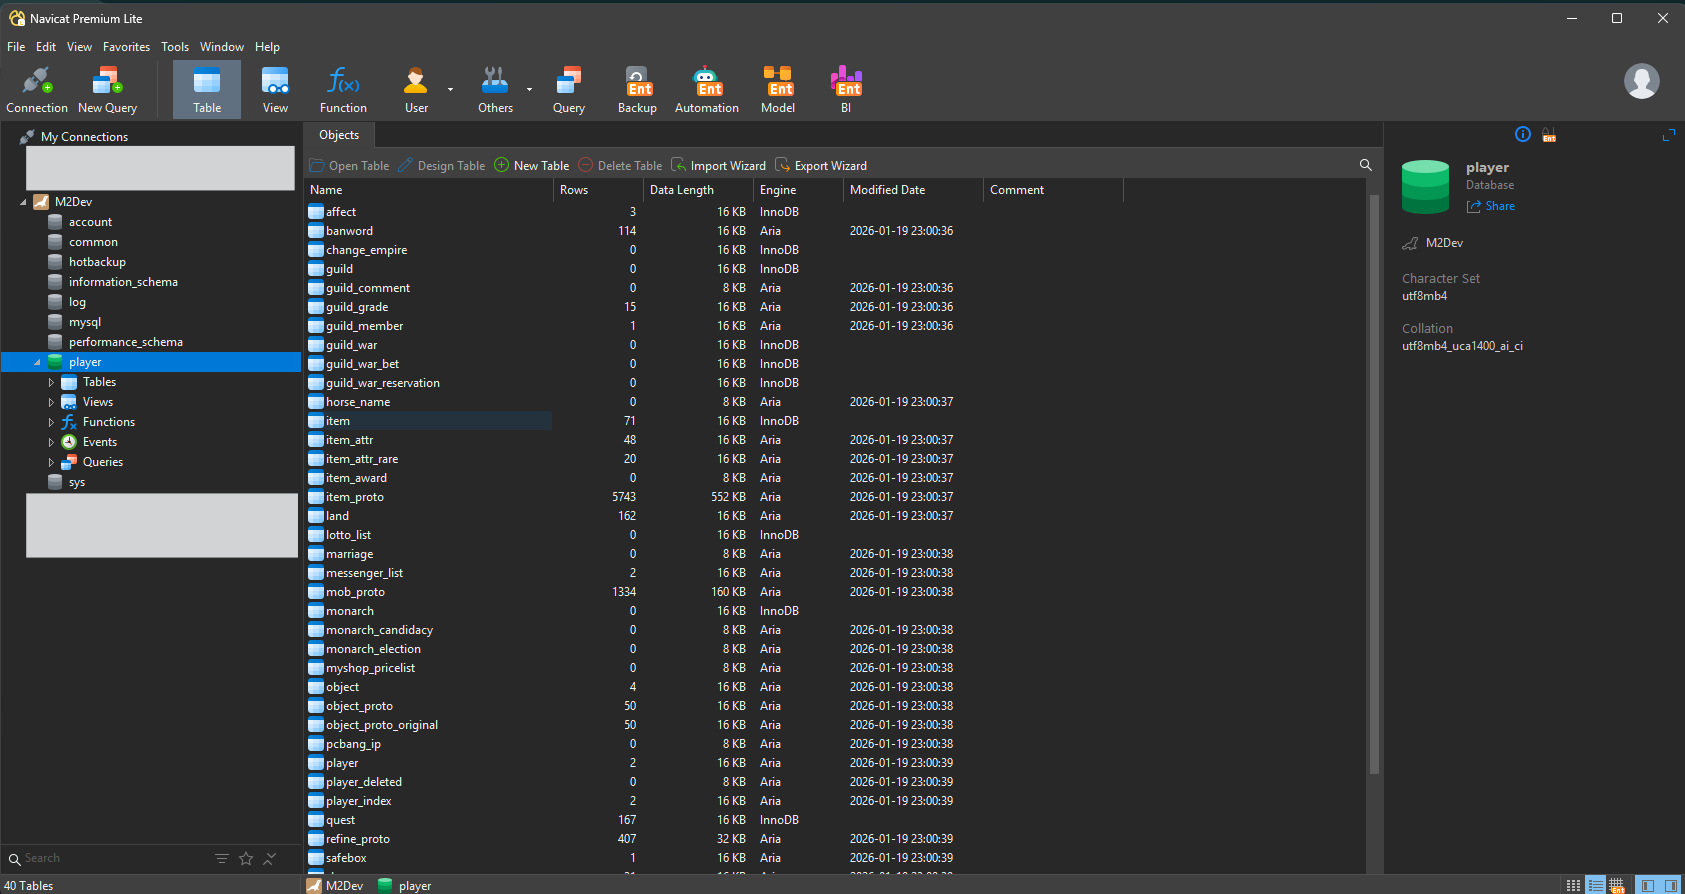
> If you open up your MariaDB connection in Navicat, your tables should be now visible!
|
|
>
|
|
> 
|
|
>
|
|
> <br>
|
|
>
|
|
> #### **2. Navicat (database management software)**
|
|
>
|
|
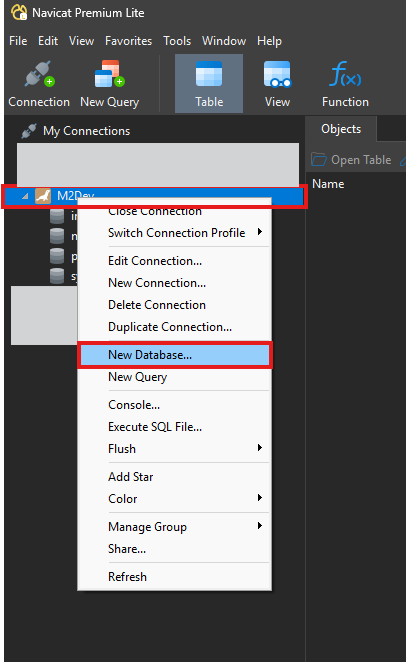
> In Navicat, double click your connection to open it. Next, select **New Database...**
|
|
>
|
|
> 
|
|
>
|
|
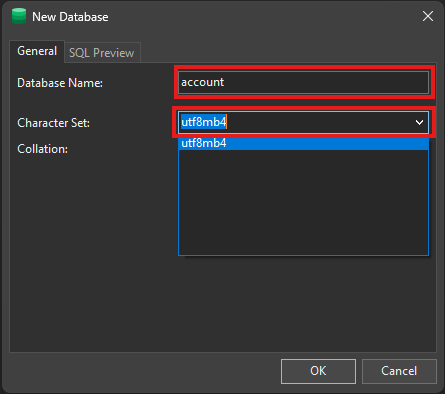
> A dialog will popup, there enter the name of your database name (e.g., `account`) in **Database Name** and make sure that **Character Set** is set to `utf8mb4` for all cases.
|
|
>
|
|
> 
|
|
>
|
|
> Do that for all 5 databases:
|
|
> - `account`
|
|
> - `common`
|
|
> - `hotbackup`
|
|
> - `log`
|
|
> - `player`
|
|
>
|
|
> <br>
|
|
>
|
|
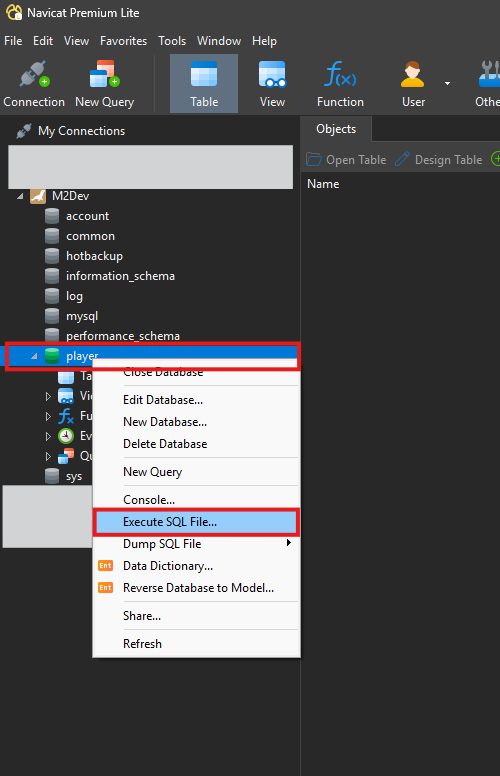
> Next, double click in a database to open it. It should turn green. Once it's open, right click on it and select **Execute SQL File...**
|
|
>
|
|
> 
|
|
>
|
|
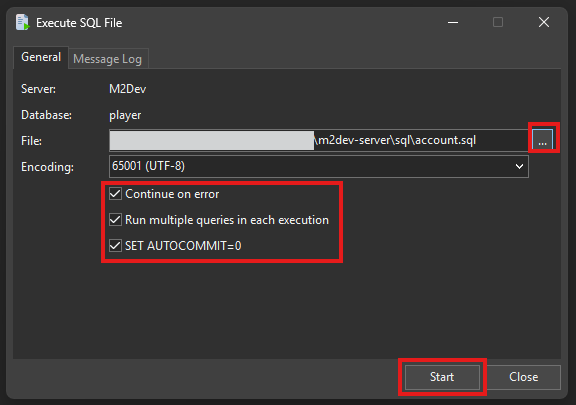
> A dialog will popup, leave all checkboxes to the default values and click the **...** button to browse through your file system (**the `sql` files need to be downloaded from the VM to your physical drive**) and select the file. Once selected, click **Start** and wait for the process to finish.
|
|
>
|
|
> 
|
|
>
|
|
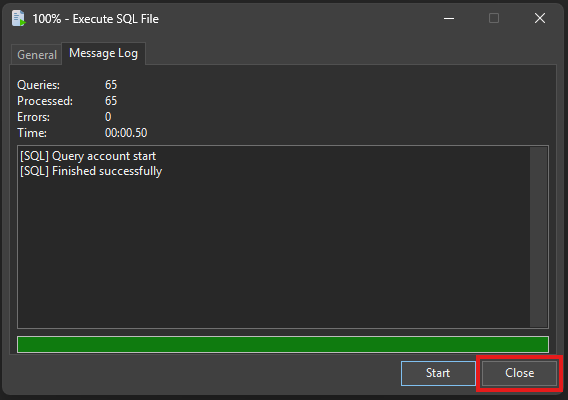
> Once this pops up, you can click **Close**.
|
|
>
|
|
> 
|
|
>
|
|
> <br>
|
|
>
|
|
> Make sure you repeat this process for all created databases (you can skip `hotbackup`)
|
|
>
|
|
> <br>
|
|
>
|
|
> If you right click and hit **Refresh** in the empty space, you should be seeing all your tables.
|
|
>
|
|
> 
|
|
>
|
|
> 
|
|
>
|
|
> <br>
|
|
>
|
|
> ### ✅ You have successfully imported all the game databases and tables!
|
|
>
|
|
> <br>
|
|
>
|
|
</details>
|
|
|
|
<br>
|
|
|
|
### ⚙️ Configuring the server
|
|
|
|
If you've done everything right so far, you are ready to turn on the server for the first time.
|
|
|
|
<details>
|
|
<summary>
|
|
One-step configuration
|
|
</summary>
|
|
|
|
<br>
|
|
|
|
>
|
|
> <br>
|
|
>
|
|
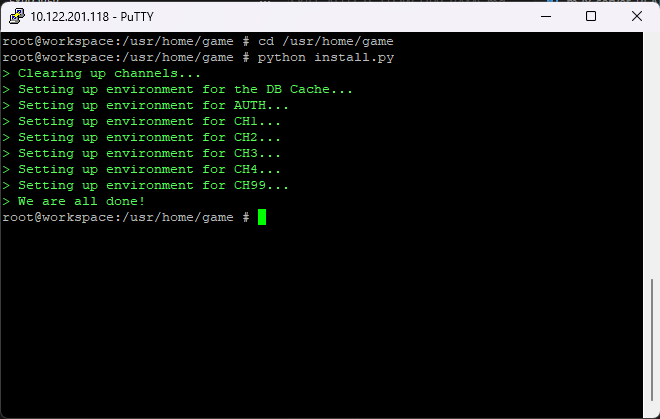
> Simply `cd` to your serverfiles' root directory (e.g., `/usr/home/game` and execute the `install.py` file)
|
|
>
|
|
> ```
|
|
> cd /usr/home/game
|
|
> python install.py
|
|
> ```
|
|
>
|
|
> You should be seeing this:
|
|
>
|
|
> 
|
|
>
|
|
> <br>
|
|
>
|
|
> ### ✅ You have successfully installed the serverfiles!
|
|
>
|
|
> <br>
|
|
>
|
|
</details>
|
|
|
|
<br>
|
|
|
|
### 🎮 Starting the server for the first time
|
|
|
|
All you need is one command in the terminal.
|
|
|
|
<br>
|
|
|
|
<details>
|
|
<summary>
|
|
The command
|
|
</summary>
|
|
|
|
<br>
|
|
|
|
>
|
|
> <br>
|
|
>
|
|
> Simply `cd` to your serverfiles' root directory (e.g., `/usr/home/game` and execute the `start.py` file)
|
|
>
|
|
> ```
|
|
> cd /usr/home/game
|
|
> python start.py
|
|
> ```
|
|
>
|
|
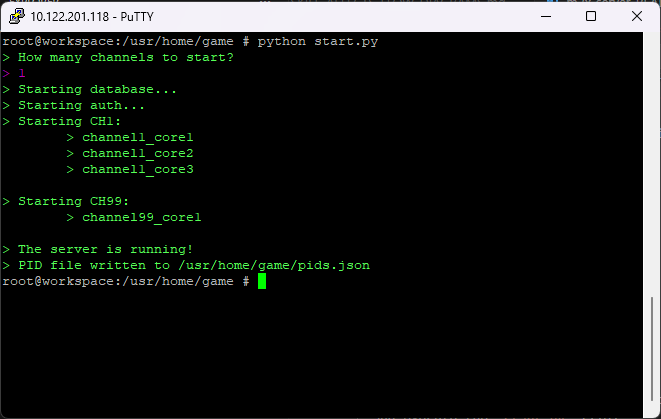
> Next, select how many channels you would like to start and hit ENTER.
|
|
>
|
|
> You should be seeing this:
|
|
>
|
|
> 
|
|
>
|
|
> <br>
|
|
>
|
|
> ### ✅ You have successfully started the server!
|
|
>
|
|
> <br>
|
|
>
|
|
</details>
|
|
|
|
<br>
|
|
<br>
|
|
|
|
---
|
|
|
|
<br>
|
|
<br>
|
|
|
|
##  **Windows**
|
|
|
|
This process will be almost identical to the **FreeBSD** method, only a few little things change here.
|
|
|
|
<br>
|
|
|
|
### 🧱 Software Prerequisites
|
|
|
|
<details>
|
|
<summary>
|
|
Please make sure that you have installed the following software in your machine before continuing:
|
|
</summary>
|
|
|
|
<br>
|
|
|
|
> <br>
|
|
>
|
|
> -  **Python**: The software used to execute python scripts. It is **recommended to ADD TO PATH** at the end of the installation. [Download](https://www.python.org/downloads/)
|
|
>
|
|
> <br>
|
|
>
|
|
|
|
</details>
|
|
|
|
<br>
|
|
|
|
### ⬇️ Obtaining the Serverfiles
|
|
|
|
First things first, find a folder of your choosing where you will be cloning the Serverfiles project (server).
|
|
|
|
<details>
|
|
<summary>
|
|
Here's how
|
|
</summary>
|
|
|
|
<br>
|
|
|
|
>
|
|
> <br>
|
|
>
|
|
>
|
|
> Create a new folder in a location of your choosing and open up a command prompt into that folder (or `cd` there).
|
|
>
|
|
> The, execute this command:
|
|
>
|
|
> ```
|
|
> git clone https://github.com/d1str4ught/m2dev-server.git
|
|
> ```
|
|
>
|
|
> <br>
|
|
>
|
|
> ### ✅ You have successfully obtained the Serverfiles project!
|
|
>
|
|
> <br>
|
|
>
|
|
</details>
|
|
|
|
<br>
|
|
|
|
### 🛻 Getting everything in the right place
|
|
|
|
Before getting into the actual configuration of the files, it is very important that you get your **compiled binaries** into the right places.
|
|
|
|
**If you haven't compiled the Server Source yet, you should pause here, compile everything and come back to this point**!
|
|
|
|
<details>
|
|
<summary>
|
|
After your builds are done
|
|
</summary>
|
|
|
|
<br>
|
|
|
|
>
|
|
> <br>
|
|
>
|
|
> What you need to do is distribute the built binaries in their respective locations within the **Server** project. You will find the built binaries in the `server-src\build` folder:
|
|
> - game.exe
|
|
> - db.exe
|
|
> - qc.exe
|
|
>
|
|
> Simply copy them from the `build` folder and into their respective destinations:
|
|
>
|
|
> - `m2dev-server\share\bin\game.exe`
|
|
>
|
|
> - `m2dev-server\share\bin\db.exe`
|
|
>
|
|
> - `m2dev-server\share\locale\english\quest\qc.exe`
|
|
>
|
|
> **Note**: For `qc`, replace `english` with your locale if you have changed it.
|
|
>
|
|
> <br>
|
|
>
|
|
> ### ✅ You have distributed your built binaries to their destination directories!
|
|
>
|
|
> <br>
|
|
>
|
|
</details>
|
|
|
|
<br>
|
|
|
|
### 🛠️ Building the quests
|
|
|
|
This step is gonna be extremely easy and most of you are very familiar with it.
|
|
|
|
<details>
|
|
<summary>
|
|
Here's what to do
|
|
</summary>
|
|
|
|
<br>
|
|
|
|
>
|
|
> <br>
|
|
>
|
|
> First, open up a command prompt (or `cd`) into the destination directory of your `qc` built binary.
|
|
>
|
|
> Next, run the `make.py` file to execute the `qc` and build all your quests:
|
|
>
|
|
> ```
|
|
> python make.py
|
|
> ```
|
|
>
|
|
> **WARNING**: You need to **first `cd` into the quests folder** before executing the `make.py` script!
|
|
> Commands like:
|
|
> ```
|
|
> python C:\m2dev-server\share\locale\english\quest\make.py
|
|
> ```
|
|
> **will result in errors!**
|
|
>
|
|
> This happens because when you `cd` in a folder you are changing the `cwd` (current working directory). If your `cwd` is not the `quest` folder, the `make.py` script will not be able to find your quests and hence, an error will appear.
|
|
>
|
|
> <br>
|
|
>
|
|
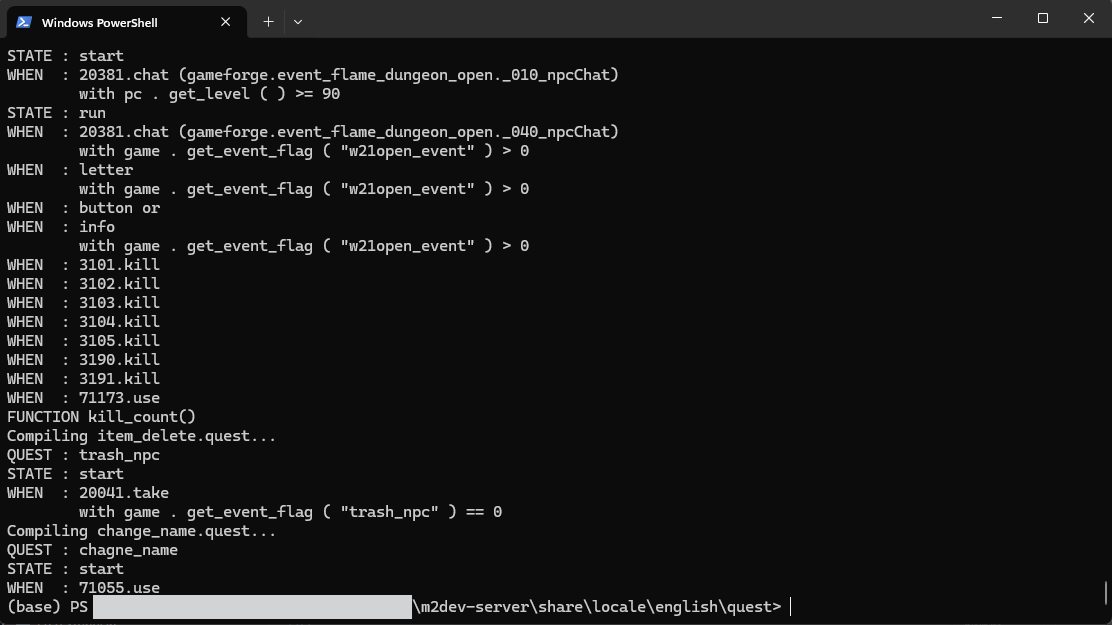
> After `qc` has done its job, your terminal should be looking like this:
|
|
>
|
|
> 
|
|
>
|
|
> <br>
|
|
>
|
|
> ### ✅ You have successfully built the quests!
|
|
>
|
|
> <br>
|
|
>
|
|
</details>
|
|
|
|
<br>
|
|
|
|
### 📊 Importing the databases and tables
|
|
|
|
If you've configured your database correctly in the Server Source part and you can successfully connect to your root account with your terminal or/end your database management software (Navicat), then this process is gonna be very easy.
|
|
|
|
<details>
|
|
<summary>
|
|
The process
|
|
</summary>
|
|
|
|
<br>
|
|
|
|
>
|
|
> <br>
|
|
>
|
|
> There's 5 different databases that you need to import into your MariaDB/MySQL Server:
|
|
> - `account`
|
|
> - `common`
|
|
> - `hotbackup` (empty database, needs to simply exist)
|
|
> - `log`
|
|
> - `player`
|
|
>
|
|
> <br>
|
|
>
|
|
> You have 2 options to import these databases and their tables
|
|
>
|
|
> #### **1. Command Prompt**
|
|
> First, you need to create the 5 databases before importing their tables and data.
|
|
>
|
|
> In your command prompt type these commands:
|
|
>
|
|
> ```
|
|
> CREATE DATABASE account;
|
|
> CREATE DATABASE common;
|
|
> CREATE DATABASE player;
|
|
> CREATE DATABASE log;
|
|
> CREATE DATABASE hotbackup;
|
|
> exit;
|
|
> ```
|
|
>
|
|
> <br>
|
|
>
|
|
> Next, in your `m2dev-server\game\sql` (or wherever you installed the serverfiles) you have some `*.sql` files (`account.sql`, `common.sql`, etc...).
|
|
>
|
|
> You can use these files to import everything with a simple command.
|
|
>
|
|
> First, open up a command prompt inside or `cd` into the `\sql` folder and then:
|
|
>
|
|
> ```
|
|
> 'C:\Program Files\MariaDB 12.1\bin\mariadb.exe' -u root -p account < account.sql
|
|
> 'C:\Program Files\MariaDB 12.1\bin\mariadb.exe' -u root -p common < common.sql
|
|
> 'C:\Program Files\MariaDB 12.1\bin\mariadb.exe' -u root -p log < log.sql
|
|
> 'C:\Program Files\MariaDB 12.1\bin\mariadb.exe' -u root -p player < player.sql
|
|
> ```
|
|
> **Make sure you use your own installation path.**
|
|
>
|
|
> <br>
|
|
>
|
|
> If you open up your MariaDB connection in Navicat, your tables should be now visible!
|
|
>
|
|
> 
|
|
>
|
|
> <br>
|
|
>
|
|
> #### **2. Navicat (database management software)**
|
|
>
|
|
> In Navicat, double click your connection to open it. Next, select **New Database...**
|
|
>
|
|
> 
|
|
>
|
|
> A dialog will popup, there enter the name of your database name (e.g., `account`) in **Database Name** and make sure that **Character Set** is set to `utf8mb4` for all cases.
|
|
>
|
|
> 
|
|
>
|
|
> Do that for all 5 databases:
|
|
> - `account`
|
|
> - `common`
|
|
> - `hotbackup`
|
|
> - `log`
|
|
> - `player`
|
|
>
|
|
> <br>
|
|
>
|
|
> Next, double click in a database to open it. It should turn green. Once it's open, right click on it and select **Execute SQL File...**
|
|
>
|
|
> 
|
|
>
|
|
> A dialog will popup, leave all checkboxes to the default values and click the **...** button to browse through your file system (**the `sql` files need to be downloaded from the VM to your physical drive**) and select the file. Once selected, click **Start** and wait for the process to finish.
|
|
>
|
|
> 
|
|
>
|
|
> Once this pops up, you can click **Close**.
|
|
>
|
|
> 
|
|
>
|
|
> <br>
|
|
>
|
|
> Make sure you repeat this process for all created databases (you can skip `hotbackup`)
|
|
>
|
|
> <br>
|
|
>
|
|
> If you right click and hit **Refresh** in the empty space, you should be seeing all your tables.
|
|
>
|
|
> 
|
|
>
|
|
> 
|
|
>
|
|
> <br>
|
|
>
|
|
> ### ✅ You have successfully imported all the game databases and tables!
|
|
>
|
|
> <br>
|
|
>
|
|
</details>
|
|
|
|
<br>
|
|
|
|
### ⚙️ Configuring the server
|
|
|
|
If you've done everything right so far, you are ready to turn on the server for the first time.
|
|
|
|
<details>
|
|
<summary>
|
|
One-step configuration
|
|
</summary>
|
|
|
|
<br>
|
|
|
|
>
|
|
> <br>
|
|
>
|
|
> Simply `cd` to your serverfiles' root directory (e.g., `/usr/home/game` and execute the `install.py` file)
|
|
>
|
|
> ```
|
|
> cd /usr/home/game
|
|
> python install.py
|
|
> ```
|
|
>
|
|
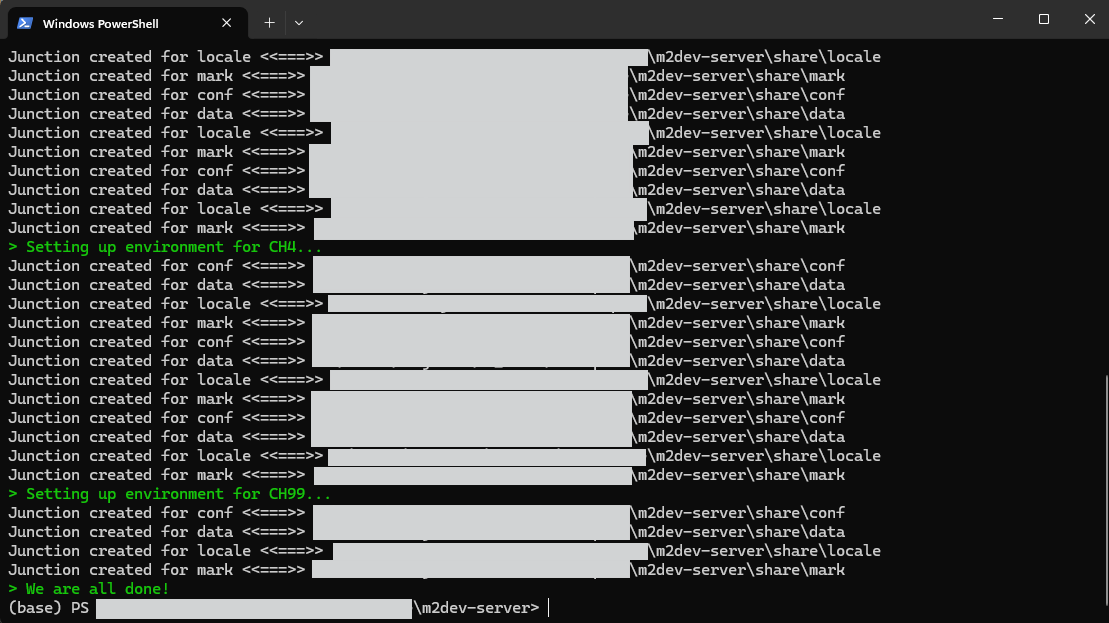
> You should be seeing this:
|
|
>
|
|
> 
|
|
>
|
|
> <br>
|
|
>
|
|
> ### ✅ You have successfully installed the serverfiles!
|
|
>
|
|
> <br>
|
|
>
|
|
</details>
|
|
|
|
<br>
|
|
|
|
### 🎮 Starting the server for the first time
|
|
|
|
All you need is one command in the terminal.
|
|
|
|
<br>
|
|
|
|
<details>
|
|
<summary>
|
|
The command
|
|
</summary>
|
|
|
|
<br>
|
|
|
|
>
|
|
> <br>
|
|
>
|
|
> Simply `cd` to your serverfiles' root directory (e.g., `/usr/home/game` and execute the `start.py` file)
|
|
>
|
|
> ```
|
|
> cd /usr/home/game
|
|
> python start.py
|
|
> ```
|
|
>
|
|
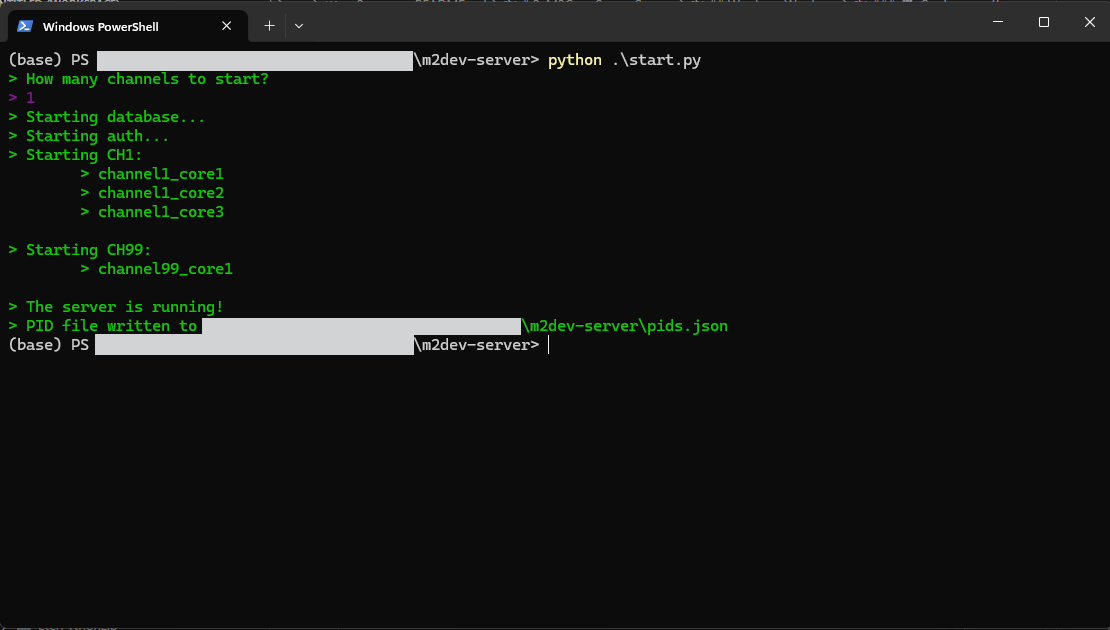
> Next, select how many channels you would like to start and hit ENTER.
|
|
>
|
|
> You should be seeing this:
|
|
>
|
|
> 
|
|
>
|
|
> <br>
|
|
>
|
|
> ### ✅ You have successfully started the server!
|
|
>
|
|
> <br>
|
|
>
|
|
</details>
|
|
|
|
<br>
|
|
<br>
|
|
|
|
---
|
|
|
|
## Basic server management scripts
|
|
Below is a little list of what the scripts inside the root folder of the project do. The names are pretty self-explanatory but here they are anyway:
|
|
|
|
- `start.py` starts the selected number of channels
|
|
- `stop.py` stops all channel instances and the database
|
|
- `install.py` installs the channels and links the folders inside `share` to each channel core
|
|
- `clear.py` clears all logs from every channel core (`pid.json`, `syserr.log`, `syslog.log`, any `.core` files as well as the `log` folder)
|
|
- `channels.py` dependency of `install.py`, running it doesn't do anything
|
|
- `perms.py` (Linux only) assigns full permissions to the binaries (`game`, `db` and `qc`)
|
|
|
|
<br>
|
|
<br>
|
|
|
|
---
|
|
|
|
<br>
|
|
<br>
|
|
|
|
## Recap
|
|
After finishing this part, you should now have knowledge of:
|
|
|
|
- The base structure of the serverfiles
|
|
- Creating and populaing MariaDB databases and tables through `sql` scripts using the terminal/command line or Navicat's interface
|
|
- Building the quests
|
|
- Managing the server (starting/stopping/clearing/installing)
|
|
|
|
<br>
|
|
|
|
## 🔥 Your server is now live!
|
|
|
|
<br>
|
|
|
|
## Next steps
|
|
After following either the **FreeBSD** method or the **Windows** method, you should be ready to proceed to cloning, building and distributing the [Client Source project](https://github.com/d1str4ught/m2dev-client-src)
|
|
|
|
⭐ **NEW**: We are now on Discord, feel free to [check us out](https://discord.gg/ETnBChu2Ca)! |