M2Dev Client Source
![]()
This repository contains the source code necessary to compile the game client executable.
How to build (short version)
cmake -S . -B build
cmake --build build
For more installation/configuration, check out the instructions below.
📋 Changelog
Encryption & Security Overhaul
The entire legacy encryption system has been replaced with libsodium.
Removed Legacy Crypto
- Crypto++ (cryptopp) vendor library — Completely removed from the project
- Panama cipher (
CFilterEncoder,CFilterDecoder) — Removed fromNetStream - TEA encryption (
tea.h,tea.cpp) — Removed from both client and server - DH2 key exchange (
cipher.h,cipher.cpp) — Removed fromEterBase - Camellia cipher — Removed all references
_IMPROVED_PACKET_ENCRYPTION_— Entire system removed (XTEA key scheduling, sequence encryption, key agreement)adwClientKey[4]— Removed from all packet structs (TPacketCGLogin2,TPacketCGLogin3,TPacketGDAuthLogin,TPacketGDLoginByKey,TPacketLoginOnSetup) and all associated code on both client and serverLSS_SECURITY_KEY— Dead code removed ("testtesttesttest"hardcoded key,GetSecurityKey()function)
New Encryption System (libsodium)
- X25519 key exchange —
SecureCipherclass handles keypair generation and session key derivation viacrypto_kx_client_session_keys/crypto_kx_server_session_keys - XChaCha20-Poly1305 AEAD — Used for authenticated encryption of handshake tokens (key exchange, session tokens)
- XChaCha20 stream cipher — Used for in-place network buffer encryption via
EncryptInPlace()/DecryptInPlace()(zero overhead, nonce-counter based replay prevention) - Challenge-response authentication — HMAC-based (
crypto_auth) verification during key exchange to prove shared secret derivation - New handshake protocol —
HEADER_GC_KEY_CHALLENGE/HEADER_CG_KEY_RESPONSE/HEADER_GC_KEY_COMPLETEpacket flow for secure session establishment
Network Encryption Pipeline
- Client send path — Data is encrypted at queue time in
CNetworkStream::Send()(prevents double-encryption on partial TCP sends) - Client receive path — Data is decrypted immediately after
recv()in__RecvInternalBuffer(), before being committed to the buffer - Server send path — Data is encrypted in
DESC::Packet()viaEncryptInPlace()after encoding to the output buffer - Server receive path — Newly received bytes are decrypted in
DESC::ProcessInput()viaDecryptInPlace()before buffer commit
Login Security Hardening
- Removed plaintext login path —
HEADER_CG_LOGIN(direct password to game server) has been removed. All game server logins now require a login key obtained through the auth server (HEADER_CG_LOGIN2/LoginByKey) - CSPRNG login keys —
CreateLoginKey()now usesrandombytes_uniform()(libsodium) instead of the non-cryptographic Xoshiro128PlusPlus PRNG - Single-use login keys — Keys are consumed (removed from the map) immediately after successful authentication
- Shorter key expiry — Expired login keys are cleaned up after 15 seconds (down from 60 seconds). Orphaned keys (descriptor gone, never expired) are also cleaned up
- Login rate limiting — Per-IP tracking of failed login attempts. After 5 failures within 60 seconds, the IP is blocked with a
BLOCKstatus and disconnected. Counter resets after cooldown or successful login - Removed Brazil password bypass — The
LC_IsBrazil()block that unconditionally disabled password verification has been removed
Pack File Encryption
- libsodium-based pack encryption —
PackLibnow uses XChaCha20-Poly1305 for pack file encryption, replacing the legacy Camellia/XTEA system - Secure key derivation — Pack encryption keys are derived using
crypto_pwhash(Argon2id)
Installation/Configuration
This is the third part of the entire project and it's about the client binary, the executable of the game.
Below you will find a comprehensive guide on how to configure all the necessary components from scratch.
This guide is made using a Windows environment as the main environment and cannot work in non-Windows operating systems!
This guide also uses the latest versions for all software demonstrated as of its creation date at February 4, 2026.
© All copyrights reserved to the owners/developers of any third party software demonstrated in this guide other than this project/group of projects.
📋 Order of projects configuration
If one or more of the previous items is not yet configured please come back to this section after you complete their configuration steps.
- ✅ M2Dev Server Source
- ✅ M2Dev Server
- ▶️ M2Dev Client Source [YOU ARE HERE]
- ⏳ M2Dev Client [ALSO CONTAINS ADDITIONAL INFORMATION FOR POST-INSTALLATION STEPS]
🧱 Software Prerequisites
Please make sure that you have installed the following software in your machine before continuing:
Visual Studio: The software used to edit and compile the source code. Download
Visual Studio Code (VS Code): A lighter alternative to Visual Studio, harder to build the project in this software but it is recommended for code editing. Download
Git: Used to clone the repositories in your Windows machine. Download
CMake: Required for setting up and configuring the build of the source code. Download
Notepad++ (optional but recommended): Helps with quick, last minute edits. Download
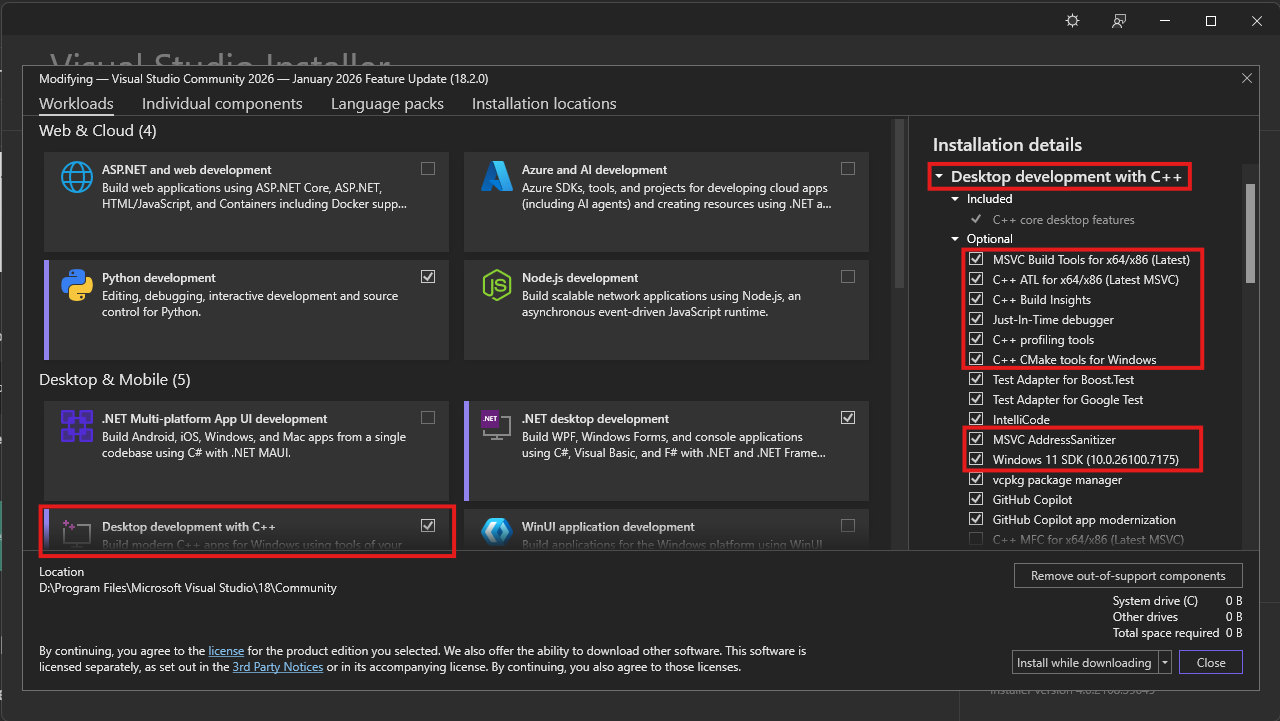
👁️ Required Visual Studio packages
Make sure you have installed these packages with Visual Studio Installer in order to compile C++ codebases:
Packages
Note: Windows 11 SDK's can be replaced by Windows 10 SDK's, but it is recommended to install one of them.

⬇️ Obtaining the Client Source
To build the source for the first time, you first need to clone it. In your command prompt, cd into your desired location or create a new folder wherever you want and download the project using Git.
Here's how
Open up your terminal inside or
cdinto your desired folder and type this command:git clone https://github.com/d1str4ught/m2dev-client-src.git
✅ You have successfully obtained the Client Source project!
🛠️ Building the Source Code
Building the project is extremely simple, if all Visual Studio components are being installed correctly.
Instructions
Open up your terminal inside, or
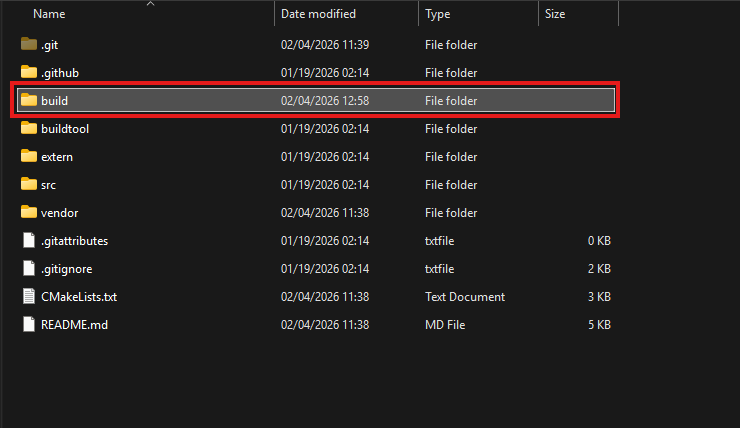
cdin your project's root working directory and initialize the build with this command:cmake -S . -B buildA new
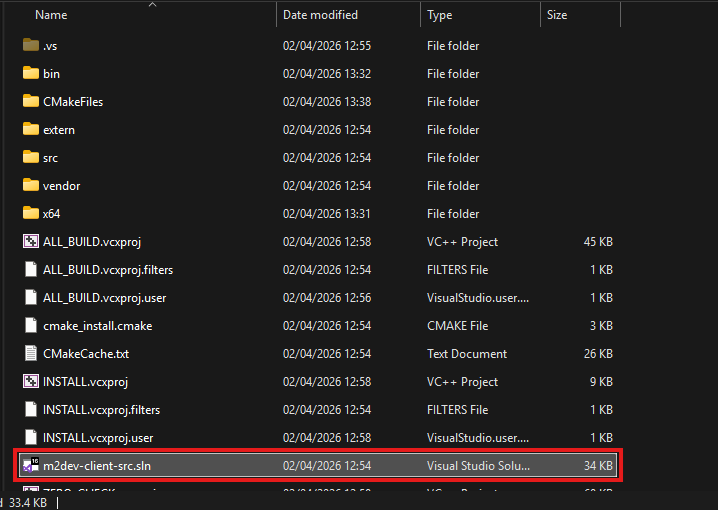
buildfolder has been created in your project's root directory. This folder contains all the build files and configurations, along with theslnfile to open the project in Visual Studio.
Double click on that file to launch Visual Studio and load the project.
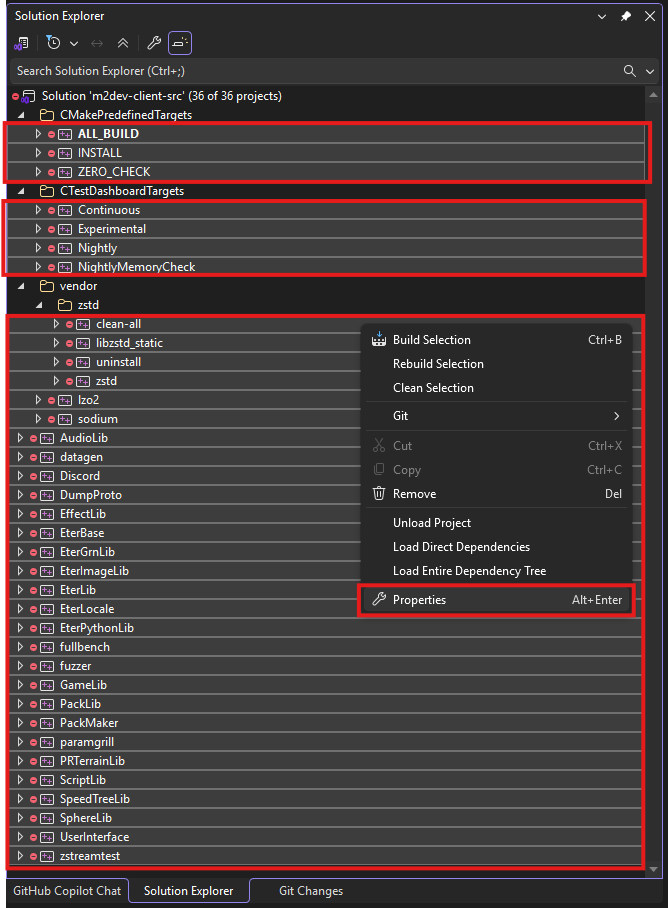
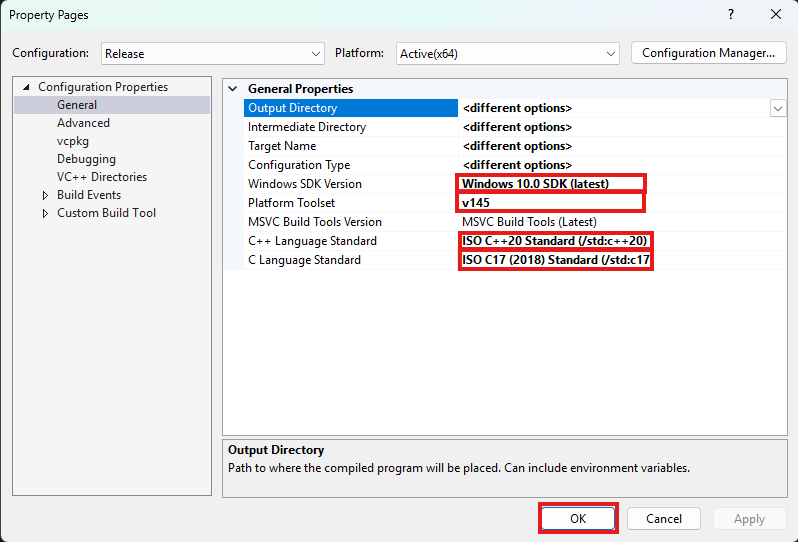
In the Solution Explorer, select all the projects minus the container folders, right click on one of the selected items, and click Properties
Next, make sure that the following settings are adjusted like this:
- Windows SDK Version should be the latest of Windows 10. It is not recommended to select any Windows 11 versions yet if avalable.
- Platform Toolset is the most important part for your build to succeed! Select the highest number you see. v145 is for Visual Studio 2026. If you are running Visual Studio 2022 you won't have that, you will have v143, select that one, same goes for older Visual Studio versions.
- C++ Language Standard should be C++20 as it is the new standard defined in the CMakeList.txt files as well. Might as well set it like that for all dependencies.
- C Language Standard should be C17 as it is the new standard defined in the CMakeList.txt files as well. Might as well set it like that for all dependencies.
Once done, click Apply and then OK to close this dialog.
After that, in the toolbar at the top of the window, select your desired output configuration:
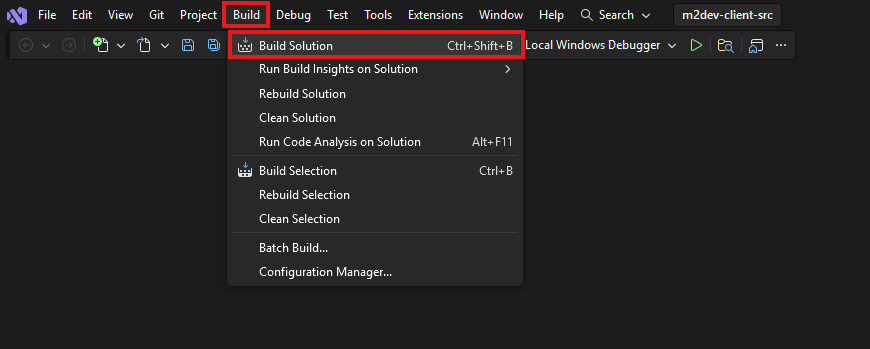
Finally, click on the Build option at the top and select Build Solution, or simply press CTRL+SHIFT+B in your keyboard with all the projects selected.
Note: if this is NOT your first build after executing the
cmake -S . -B buildcommand for this workspace, it is recommended to click Clean Solution before Build Solution.
Where to find your compiled binaries:
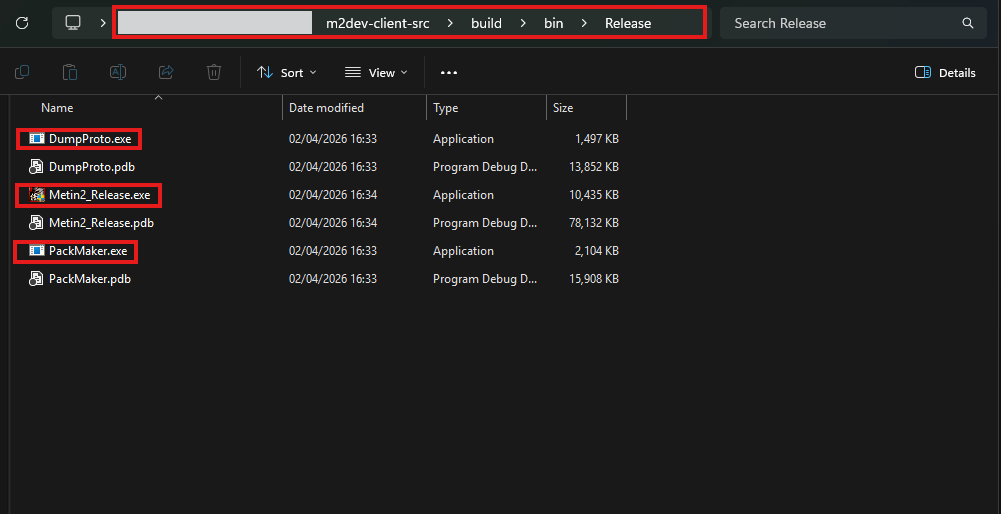
Inside the build folder in your cloned repository, you should have a bin folder and inside that, you should have a Debug, Release, RelWithDebInfo or MinSizeRel folder, depending on your build configuration selection.
In that folder you should be seeing all your binaries:
If you did NOT install the Client project yet, you are done here.
If you HAVE the Client project installed, paste these 2
.exefiles in these locations inside the Server project:
- Metin2_<Debug|Release|RelWithDebInfo|MinSizeRel>.exe: inside root folder of the Client project
- PackMaker.exe: inside
assets\PackMaker.exe
✅ You have successfully built the Client Source!

🔥 The Client Source part of the guide is complete!
Next steps
You should now be finally ready to proceed to Client project packing and entering the game for the first time!
⭐ NEW: We are now on Discord, feel free to check us out!